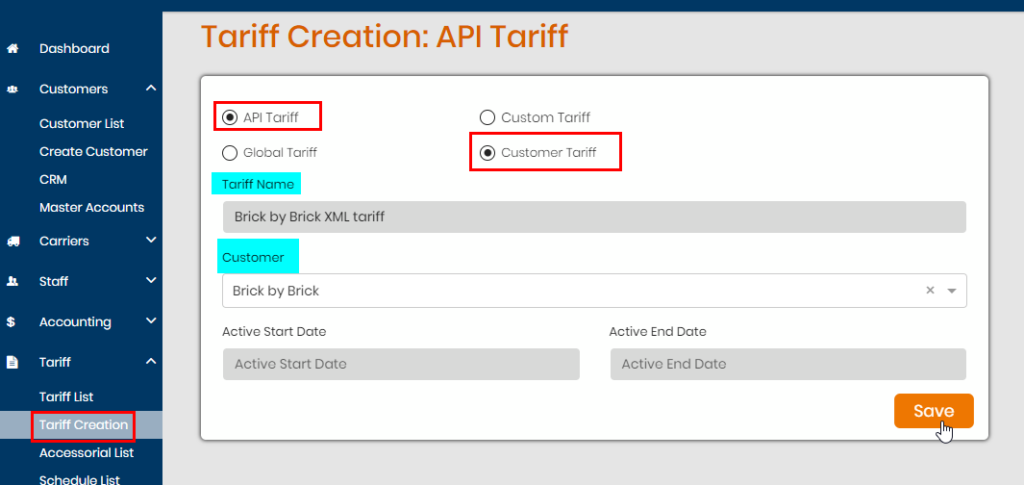
First, you need to create a customer level API tariff and assign it to at least 1 customer profile (You can assign more customers after the first initial save). Name the tariff whatever you wish.

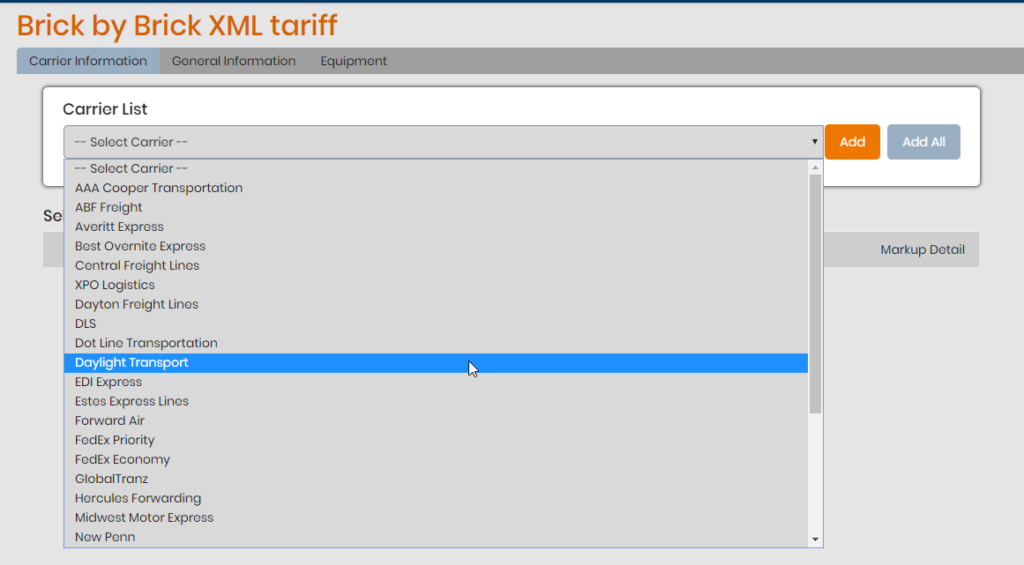
Once the XML tariff is saved, use the drop down for the carrier list to select which carrier you will want to add to this customer’s tariff. Please note this shows the carriers that are enabled for web services from your Integrations > Carriers list. Select one and hit Add.
Another window will appear which will let you enter a display name to show on the LCR (optional) and also set a markup for the carrier’s cost. Be sure to hit Save Changes to save the carrier to the tariff.
You can also setup account specific info for this carrier for the customer using the Customer Specific Pricing check box.


When the carrier is saved you will see it under Selected Carriers. To enter a bill to specific to this carrier, click the <-> symbol under Markup Detail.

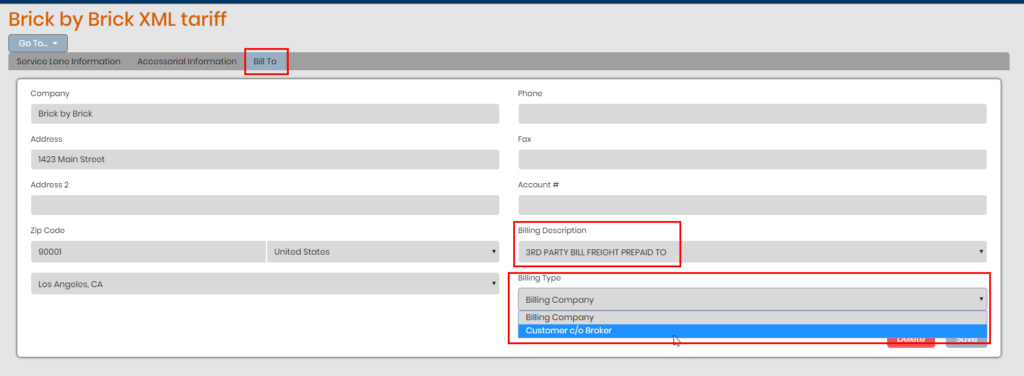
Click on the Bill-To header at the top. Fill out the company info (at least a name, address and zip code are required).
There is also Billing Description and Billing Type. The description is for how you are describing to the carrier the type of bill to and the billing type is for how you want the company info displayed.

The next time a load is created for the customer with this customer API tariff and bill to set for a particular carrier, the bill to will read specifically to what is set on the tariff.
