• Skip to main content
  • Skip to header right navigation
  • Skip to site footer
3PL Support

3PL Support

BrokerWare Support from 3PL Systems

  • 3PL University
  • Change Requests
  • News & Updates
  • Dev Center
  • 3PL Systems
  • 3PL University – Videos [129]
    • Operations [42]
      • Dashboard [4]
        • Dashboard General Overview
        • Dashboard Tile Overview [1]
          • Dispatching – Booked Covered Tile
        • Source Capacity Dashboard
      • Customers [15]
        • Creating a Customer
        • Customer List
        • Customer Profile [6]
          • Customer Profile – Overview
          • Customer Contacts List
          • Adding a Customer Contact
          • Customer Address Book
          • How to Add a Third-Party Payer
          • Custom Carrier Compliance Events
        • Master Accounts [2]
          • Master Accounts
          • Address Book/Contacts/Products
        • Customer Portal [2]
          • Customer Portal Dashboard
          • Entering and Quoting a Load in Customer Portal
      • Carriers [4]
        • How to Add a TL Carrier
        • Carrier Contact Functions
        • Carrier Portal
        • Add/Update Carrier Insurance
      • Staff [2]
        • Create Staff
        • Office Locations
      • Load/Shipment [12]
        • How to Create a Load
        • Shipment Profile Lifecycle
        • Customer Rate Quotes – Electronic Signatures
        • Load Profile [8]
          • Commodity Field
          • Adding Additional Carriers
          • How to Change or remove a Carrier from a Load
          • Source Capacity (Volume Quotes) [2]
            • Overview
            • Sending Volume Rate Request
          • Dispatching – Manual and E-Mail Dispatch
          • Priority Shipments (Hot/Trace)
    • Accounting [41]
      • Shipment [4]
        • Modify Pricing
        • Changing Carriers
        • Multiple Carrier Bills
        • How to add a Third-Party Payer
      • How to Create an Invoice
      • Accounts Receivable [1]
        • AR Aging Detail
      • Accounts Payable [1]
        • AP Invoicing
      • Customer Profile [5]
        • Invoice Preferences [1]
          • Late Fees
        • Customer Statement [2]
          • Overview
          • Scheduling Invoices/Statements
      • Invoice Printing [3]
        • Overview
        • Print History
        • Reset Printing Queue
      • Office Locations
      • HyperionTMS – Accounting Updates (June 2022) [11]
        • AR & AP – Invoicing [4]
          • AR & AP Invoicing
          • AR – Invoice Revision – Increase
          • AR – Revision – Credit Memo
          • AP – Revision – Accrual Based
        • Check History – Void Checks
        • Commissions – Revisions
        • Invoice Preferences
        • Updated Staff Permissions
        • Carrier Sales
        • Webinar Meeting – Recording 6/12/2022
      • Internal Accounting [2]
        • Pay Bills
        • Pay Invoices
      • QuickBooks [4]
        • QuickBooks Desktop [2]
          • Sync Tool Configuration
          • Customer Recon Tool
        • QuickBooks Online
    • Tariff [18]
      • Tariff Creation [12]
        • API Tariff [5]
          • API Tariff Overview
          • Create a Global API Tariff
          • Create a Customer API Tariff
          • Add Service Lane Markup (API)
          • Adding Carriers to API Tariff – Customer Specific
        • Custom Tariff [4]
          • Custom Tariff Overview
          • Creating a Custom Carrier Tariff
          • Creating a Custom Customer Tariff
          • Creating a Custom Markup Tariff
        • Editing a Service Lane
      • Tariff List
      • Accessorials
      • Regions
      • Fuel Schedule & Schedule List
      • Pricing Programs
    • More [24]
      • Advanced Search
      • Carrier Sales
      • Custom Reference Fields [4]
        • Global Custom Reference Fields
        • Customer Custom Reference Fields
        • Where to Find Custom Reference Fields
        • How to report Custom Reference Fields
      • Custom Text [1]
        • Overview
      • Documents [2]
        • Document Uploader
        • Global Documents
      • Integrations [2]
        • Carrier Integrations
        • Other Integrations
      • Report Builder [3]
        • Report Builder
        • Report Builder – Shipment Report
        • Report Builder – Customer Report
      • Ship Mind
      • System Alerts
      • OnTime Report
      • Admin [1]
        • Min and Max Margins
  • 3PL University – User Guides [71]
    • Carriers [11]
      • Carrier Groups
      • Carrier List [2]
        • Add Bill-To Address for third-party integrations
        • Carrier Portal
      • Carrier Profile [2]
        • Create a Carrier Profile
        • How to Add/Update Carrier Insurance
      • Add multiple carriers/vendors to multi stop load
      • Rate Con vs Dispatch Sheet
      • Carrier Compliance setup
      • Adding a Secondary Vendor to a load
    • Customers [12]
      • Adding Accounting Contacts
      • Adding Contacts to a Customer Profile
      • Customer Log In Access Levels
      • Customer Relationship Management (CRM)
      • Hours of Operations
      • How to add a third-party payer
      • Indicate Primary Sales Rep
      • Sending a Customer Statement and Open Invoices
      • Sending and Scheduling Customer Statements
      • Master and Sub-Accounts
      • Create a Customer Profile
      • Changing a Customer on a load.
    • Staff [10]
      • Assigned To function
      • Add an Office Location Label
      • Staff Access Levels – UPDATED [6]
        • Admin
        • Manager
        • Accounting
        • Operations
        • Customer Sales
        • Carrier Sales
      • Creating a Staff Member
    • Accounting [6]
      • Adding Canada Tax Configurations
      • Claim Log
      • Consolidated Invoicing
      • Adding carrier SCAC to Customer Invoices with PRO Number
      • Electronic Signatures
      • Billing & View function
    • Tariff [7]
      • Add Service Lane Markup to API Tariff
      • Add/Create Customer API tariff
      • Creating Accessorials
      • How to create a Pricing Program
      • Priority & Contracted Lane Indicators on Service Lanes
      • Region Lists
      • Add Bill-To information for a Customer Specific Account: API Customer Tariff
    • Documents [1]
      • Mass Document Uploader
    • Tools [2]
      • Creating a Carrier Report via Report Builder
      • Non-Compliance Feature (Events, Root Causes, QN notes)
    • Admin Tools [3]
      • Changing Document Addresses
      • Staff Groups
      • Add Equipment Types to system
    • Integrations [6]
      • Triumph Pay Audit (formally Hubtran)
      • Authorize.Net
      • SMC3 Volume Integration
      • project44 / p44 Tracking
      • Macropoint Tracking
      • Other Integrations
    • QuickBooks [3]
      • Desktop Sync Tool Configuration
      • Re-Authorize Sync Application in QuickBooks Desktop
      • Office GL Code setup – QuickBooks Desktop
  • Industry Knowledge [4]
    • EDI
    • Freight Classes
    • Package Types
    • Accessorials
  • Webinars [2]
    • Cargo Chief Digital Freight Matching and BrokerWare
    • Digital Freight Matching
  • Other [2]
    • User Group Meeting (2022)
    • BrokerWare v2 Themes (as of January 2023)
  • FAQ [2]
    • How do I submit a change or enhancement request?
    • How do I get live Support?
  • Home
  • /
  • Documentation
  • /
  • 3PL University – User Guides
  • /
  • Customers

Master and Sub-Accounts

A master account can be used to designate a main customer profile and then house sub-accounts underneath it.

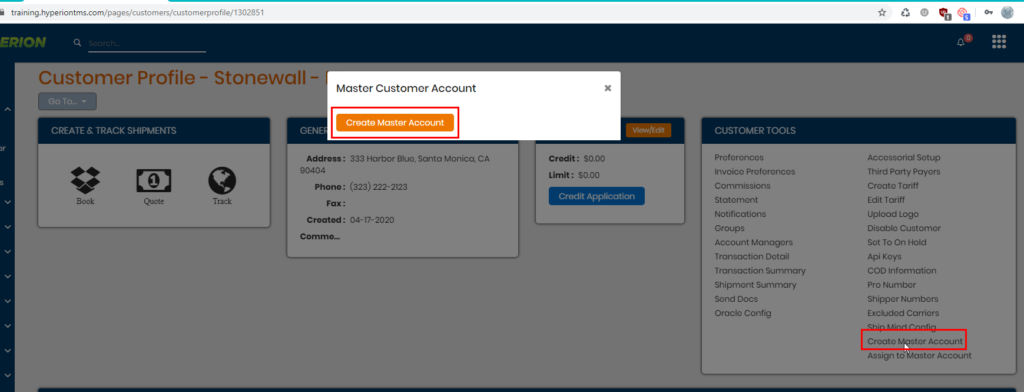
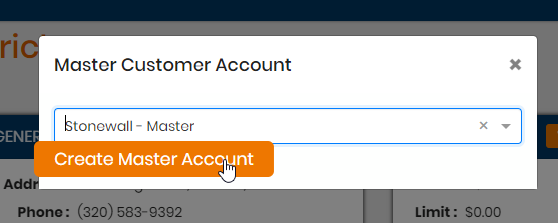
To create a master account, create a customer profile like normal. We suggest adding the word “Master” or some indication that this profile will eventually become the Master proflie. Once the customer’s profile is created, click Create Master Account on that profile.

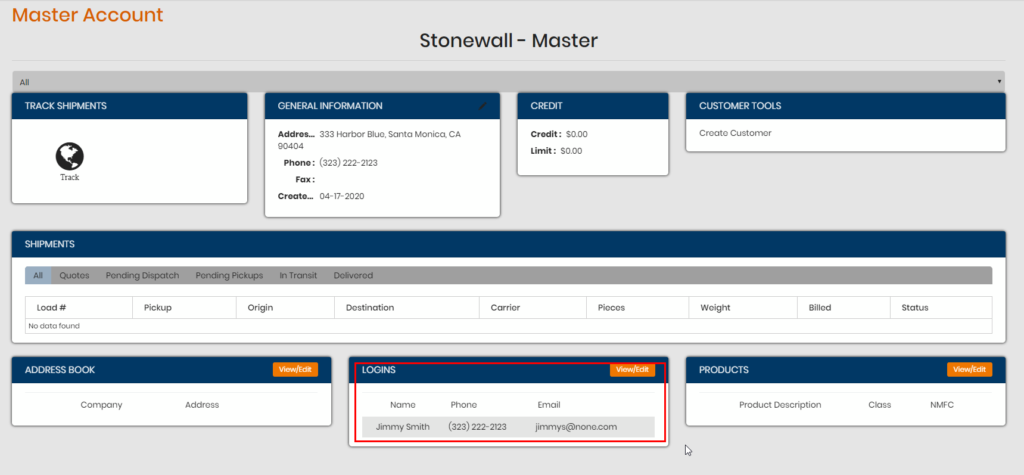
Once the master account has been created, you can now add logins to this account. A login under a master account will allow that user to view different sub accounts that are assigned to the master.

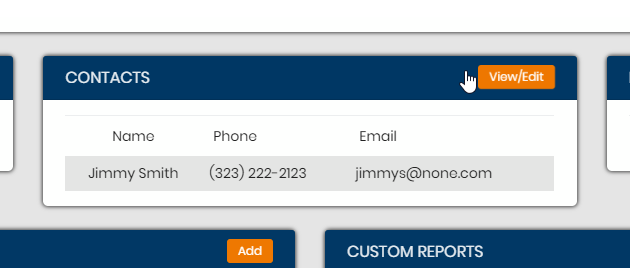
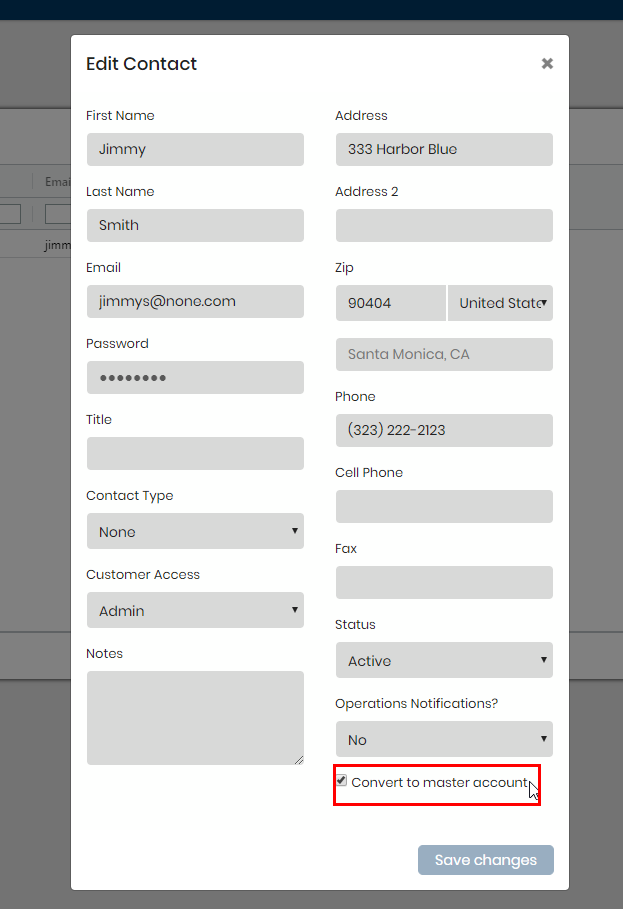
If you need to assign a previously created customer log in to the master, go to the customer profile and into Contacts. Click Edit for the contact and check off the Convert to master account box. When saved, that account will now appear in the Master Account profile page.

**Please Note** – you can only have 1 (one) unique email per customer login existing in the entire system.

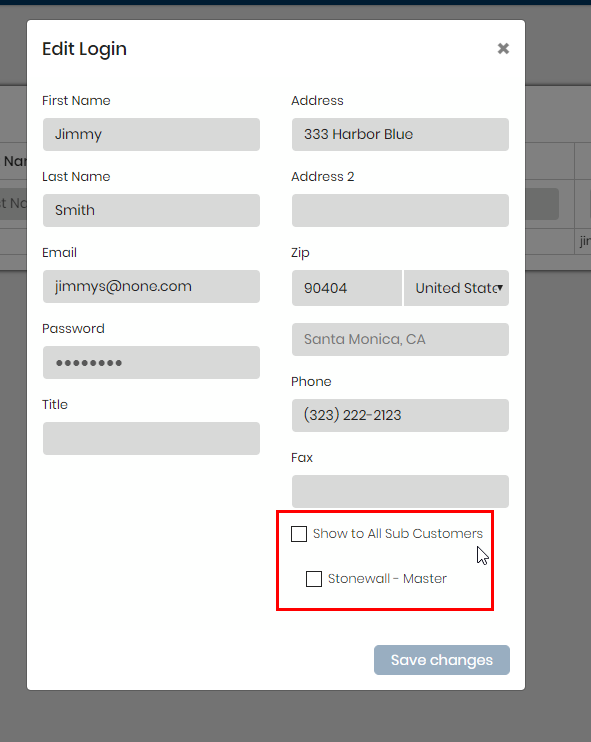
In a master account login, you have the ability to assign those master log ins to different views of sub accounts. You can either check off the Show to All Sub Customers OR select a certain few. Doing so will then show that email of the master account log ins as an option under Invoice Preferences – Email type for invoices. Invoice preferences can only be set in sub accounts; the master account does not have this setup.

Master Account log in – check all or which sub accounts you want this contact to show up in.

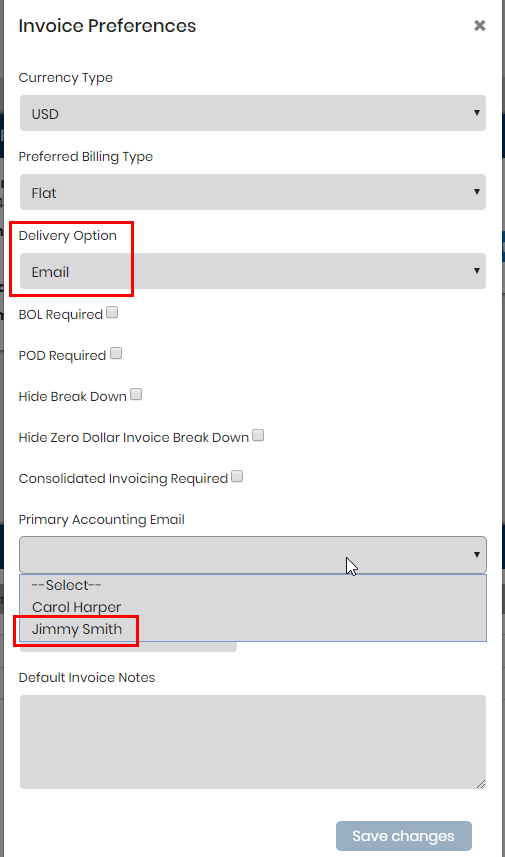
Sub account – Invoice Preferences setup. Choose Email for Delivery Option and then the drop downs below will reflect both current contacts in the sub account AND any master account log ins assigned to the sub account. In this case here, Jimmy Smith is a master account log in that will show to all sub account profiles.

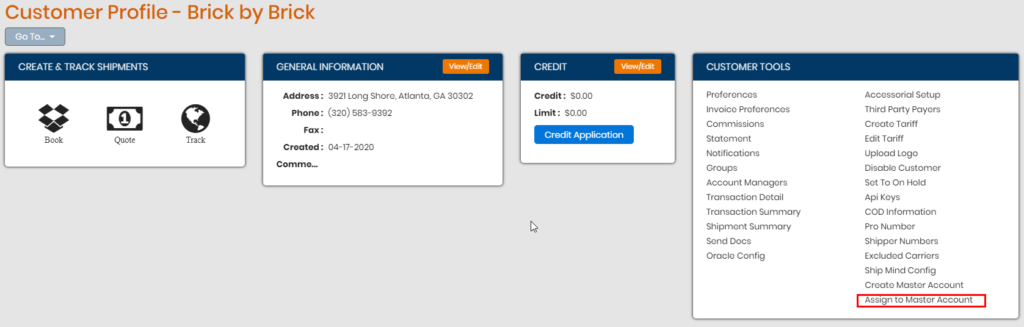
To assign a customer profile as a sub account to a master one, simply go to that customer’s profile > Assign to Master Account. The drop down will show all master accounts available to be assigned to. Pick one and commit.

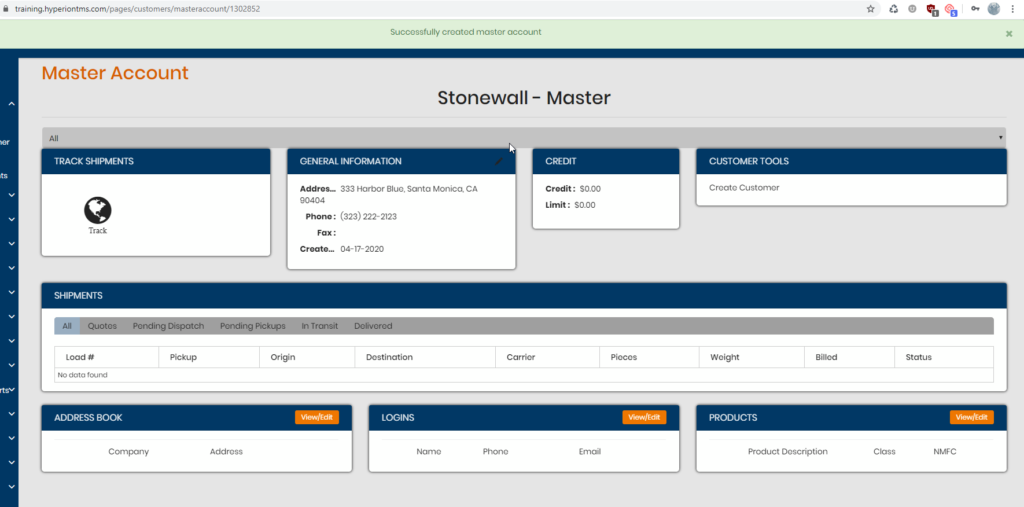
  • You will also notice a drop down below the name of the customer profile. This is how you can toggle back and forth between the master profile and the other sub accounts. The option ALL takes you to the master account; the others take you to the sub accounts.
  • Note that in the master account, you CANNOT make any loads; all loads showing are from the loads created within the sub accounts.

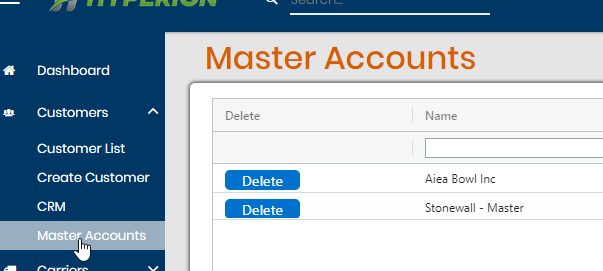
If at any time you no longer need the master account, you can go to Customers > Master Accounts and delete the master profile from here. This will un-assign all sub accounts from it and filter back the loads to the respectful profiles.

Last modified March 6, 2022

Doc navigation

< How to add a third-party payer Create a Customer Profile >
Was this page helpful?
Yes 1 No

Need More Support?

Getting a hold of a team member is easy. You can contact our support team Monday through Friday from 6:00 am – 5:00pm (Pacific Time).

Email: [email protected]

Phone: 800.965.8205 x2

Get in touch

800-965-8205
[email protected]

Navigation

  • 3PL University
  • Change Requests
  • News & Updates
  • Dev Center
  • 3PL Systems

Search

Search 3PLSupport.com

Copyright © 2023 · 3PL Systems, Inc. · All Rights Reserved · Built by Sir Lion Labs