How to setup Truckstop.com load board integration

Select TruckStop.com from the integration options and click “add”
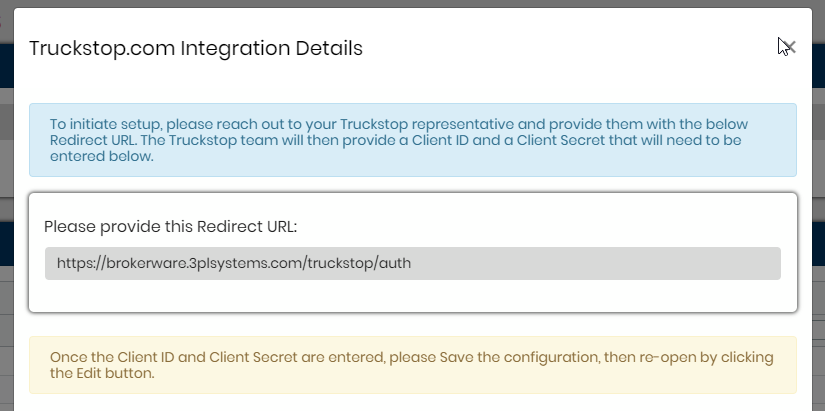
Provide your TMS’ redirect URL to your Truckstop representative to obtain the Client Id and Client Secret

Once you have the Client Id and Client Secret, enter it into the available fields and hit ‘Save changes’ then re-open it by clicking the ‘Edit’ button.
Next click on Get Authorization Code. Then Click on Pull Authorization code. The Authorization Code will populate to the “Authorization Code” field.

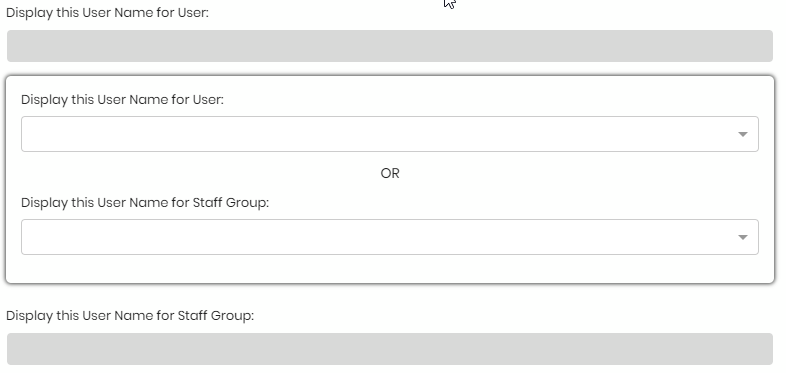
You can display this TruckStop account for a specific user (1) and give it a display name or you can display it for a specific staff group (2) and give it a display name.
Once either 1 or 2 are decided, please select the user (3) or the staff group (4) that you want this integration displayed for.
If you wish to set the status of the integration as active or disable, you can set the status here

This label is the label for the integration menu which allows you to easily identify this integration account.